
How to Wire a Main Breaker Panel
Wiring a main breaker panel means setting up the central hub that distributes electricity throughout a building. At the heart of the panel is the main breaker, a large switch that controls power to the entire system and provides overcurrent protection for all branch circuits. This process involves connecting the incoming service wires from the utility to the main lugs or main breaker, then safely routing and securing all circuit wiring to individual breakers. Because mistakes can result in electrical shock, fire hazards, or code violations, this task must comply with the National Electrical Code (NEC) and is typically handled by a licensed electrician.
Tools & Materials Needed
-
Main breaker panel
-
Circuit breakers (AFCI/GFCI as needed)
-
4-wire feeder cable (from meter/main disconnect)
-
Grounding rod and wire
-
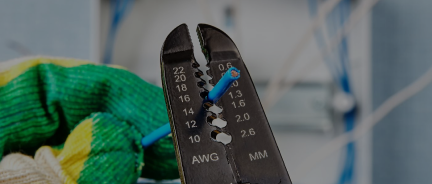
Wire stripper, screwdriver, torque wrench
-
Voltage tester
-
Fish tape (for pulling wires through conduit)
-
Electrical labels or panel directory
-
Flashlight or work light (for visibility inside the panel)
Tip: A headlamp keeps your hands free while working inside the panel enclosure.

Step-by-Step Guide to Wiring a Main Breaker Panel
1. Turn Off Power at the Main Disconnect
If this is a subpanel, ensure the main service disconnect is off before beginning any work.
Always verify with a non-contact voltage tester or multimeter that no voltage is inside the panel.
Tip: Use lockout/tagout gear to prevent accidental re-energisation during work, especially in multi-worker environments.
2. Mount the Panel
Securely fasten the panel to the wall studs, ensuring it is level and that you meet NEC clearance rules:
-
30" wide unobstructed space
-
36" front clearance
-
Maximum breaker height of 6.5 feet
Tip: Mount a piece of plywood (backer board) behind the panel for a solid surface and future flexibility in mounting conduit straps or accessories.
3. Install the Feeder Wires
From the meter or main disconnect, bring in a 4-conductor service entrance cable:
-
Black/Red (Hot) wires go to the main breaker lugs
-
White (Neutral) goes to the neutral bus bar
-
Bare/Green (Ground) goes to the ground bar
In a main panel, the neutral and ground bars are bonded (electrically connected).
-
In a subpanel, neutral and ground must remain isolated to avoid dangerous stray current paths.
-
Use feeder cables that are properly sized for the panel's amperage.
For example:
-
200A panel = 4/0 aluminum or 2/0 copper
-
100A panel = 2 AWG copper or 1/0 aluminum
Leave extra wire slack inside the panel for clean routing and future adjustments.
Tip: Avoid overly tight bends. NEC recommends a minimum bending radius of 5× the cable diameter for service conductors to reduce stress and overheating.
4. Connect the Grounding Electrode
Run a bare copper or green ground wire to a proper grounding electrode system:
-
At least one 8-ft ground rod driven into the earth
-
Connected using a ground clamp
-
If local code requires, install two rods spaced 6 ft apart
Tip: Mark the rod location visibly or in your project log — this helps for future inspections or when verifying grounding integrity.
5. Install Circuit Breakers
-
Snap the breakers into position on the panel rails
-
Route each branch circuit's black (hot) wire into its respective breaker
-
Connect white (neutral) wires to the neutral bar
-
Connect bare/green (ground) wires to the ground bar
For AFCI or GFCI breakers:
-
Hot wire (black) goes to the "Load" terminal on the breaker
-
Neutral wire (from the circuit) goes to the neutral terminal on the breaker
-
Breaker's white pigtail goes to the panel's neutral bus bar
Improperly wiring these breakers disables their protection functions.
Tip: Keep hot and neutral wires of the same circuit bundled with small zip ties, this minimises magnetic field interference and makes inspection easier.
6. Label Each Circuit
Clearly label each breaker based on its connected loads:
E.g., "Kitchen Lights," "Dryer," "HVAC," "Living Room Outlets".
Use a printed directory or marker for clarity.
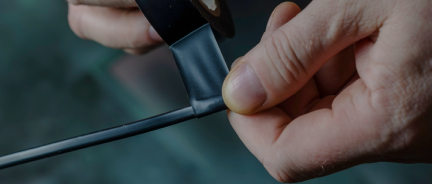
Tip: Also label each wire inside the panel using stick-on flags or printed heat-shrink labels. This helps tremendously during future troubleshooting.
7. Torque All Connections to Manufacturer Specs
Use a torque screwdriver or torque wrench to tighten all lugs and terminals as specified.
This step is critical, because over- or under-tightening can lead to arcing or overheating.
Tip: Mark each terminal with a colored dot or check mark after torquing — many inspectors expect a visual indication that torque was verified.
8. Check All Work Before Energizing
-
Verify all wire terminations are secure
-
Confirm that the bonding screw or strap is installed if this is the main panel
-
Check that the neutral and ground are properly bonded or separated, depending on panel type
-
Use a voltage tester to confirm everything is safe
Tip: Use a receptacle tester with GFCI simulation to quickly test new circuits for grounding, open neutrals, or reverse polarity after energizing.
9. Restore Power and Test
-
Flip on the main breaker
-
One by one, turn on each branch breaker
-
Use a receptacle tester or multimeter to check each connected device for correct voltage and polarity
Tip: Use this stage to test AFCI and GFCI self-test functions. They should trip when the test button is pressed. Replace any breaker that fails to respond.

Additional NEC Considerations
-
AFCI breakers are required for all living areas (e.g., bedrooms, family rooms)
-
GFCI breakers are required in wet or damp locations (e.g., bathrooms, kitchens, garages, outdoor areas)
-
Conduit fill and box fill limits must be observed
-
Use copper or aluminium wire appropriate for the terminals. Aluminum wires must be treated with an antioxidant compound
-
Always follow local amendments to the NEC, and consult your local AHJ (Authority Having Jurisdiction)
Tip: Take photos of your work at each stage. Inspectors and future electricians will thank you, and it's also great documentation for your records.
Disclaimer
Improper panel wiring can lead to electrical shock, fire, or serious code violations.
Always double-check with local code and hire a licensed electrician if you are not fully trained or confident.
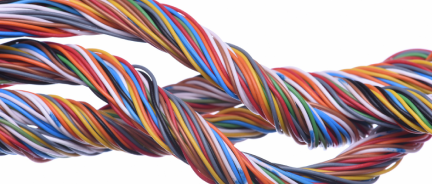
Types of Cables Used to Wire a Main Panel
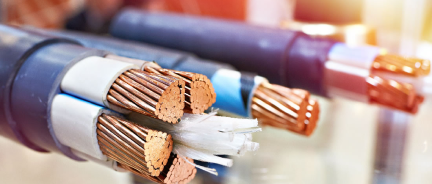
1. Service Entrance Cable (SER)
-
Used to bring power from the meter base to the main panel
-
Includes two hots, one neutral, and one ground (4-conductor)
-
Common size is 4/0 aluminium for 200A service
Common sizes:
-
4/0 aluminum for 200A service
-
2-2-2-4 aluminum SER cable for 100A subpanels
2. THHN/THWN-2 Wires in Conduit
-
Single conductors pulled through conduit (PVC, EMT, or flexible metal)
-
Often used in commercial or custom residential installations (long runs, higher amperage panels, exposed installations).
-
Allows separation of phases, neutral, and ground for large or complex panels
Common sizes:
-
2/0 copper or 4/0 aluminum for 200A
-
2 AWG copper or 1/0 aluminum for 100A
-
#8–#14 AWG for branch circuits depending on load
3. NM-B Cable (Romex)
-
Used for branch circuits inside the building
-
Comes in bundles (e.g., 14/2, 12/2, or 10/3)
-
Includes black (hot), white (neutral), and bare ground
Common sizes:
-
14/2 NM-B for 15A lighting/receptacle circuits
-
12/2 NM-B for 20A general-purpose circuits
-
10/3 NM-B for 240V appliances like dryers
4. UF-B Cable
-
Like NM-B but rated for direct burial
-
Used for branch circuits to sheds, garages, or outdoor subpanels
Common sizes:
5. MC Cable (Metal-Clad)
-
Flexible armored cable used in commercial buildings or exposed indoor areas
-
Includes individually insulated conductors with a metal sheath
-
Often required by code in multi-family or mixed-use buildings
Common sizes:
6. Feeder Cables (USE-2, XHHW-2, or Triplex URD)
-
For underground runs to detached buildings or subpanels
-
USE-2 and XHHW-2 are common for conduit installs; URD for direct burial
Common sizes:
-
4/0-4/0-2/0 Triplex URD for 200A service
-
2-2-2-4 or 2-2-2 Triplex URD for 100A subpanels
1/0 XHHW-2 or USE-2 in conduit for 150A feeders